NVIDIA Studio presents an eight-part tutorial series with Sweeper3D, guiding artists through the creation of a stunning floating castle using Blender and Photoshop, emphasizing stylized 3D photorealism.
Dive into the enchanting world of 3D art with NVIDIA Studio’s latest Studio Sessions, featuring the talented Sweeper3D. This tutorial series offers a comprehensive guide to crafting a breathtaking floating castle, blending fantasy design with realistic rendering techniques. Whether you’re a seasoned 3D artist or just starting out, you’ll discover valuable workflows, composition tricks, and worldbuilding strategies to elevate your projects.
Creating a Floating Castle in Blender & Photoshop w/ Sweeper3D Part 1: Setting up the Castle
“Creating a Floating Castle in Blender & Photoshop w/ Sweeper3D Part 1: Setting up the Castle” via NVIDIA Studio.
In the inaugural part, Sweeper3D, a freelance 3D artist specializing in fantasy environments, introduces his primary tool, Blender, and emphasizes the power of his NVIDIA RTX 3090 (and later RTX 5090) GPUs for handling heavy detail without struggle. This segment focuses on building the core floating castle, highlighting a practical, top-down approach for managing complexity.
Key takeaways include:
• Leveraging an asset library of pre-made assets to quickly block out designs.
• Working with symmetry and repeating patterns to create visually interesting and realistic castle structures.
• Utilizing the 3D cursor transform pivot point for effortless, even rotations around the castle’s center.
• Considering the overall silhouette of the castle, not just intricate details, for a strong visual foundation.
• Implementing array and curve modifiers to efficiently create circular wall sections.
• Streamlining material application by swapping materials and correcting UVs with simple cube projection, noting that perfection isn’t necessary for distant views
Creating a Floating Castle in Blender & Photoshop w/ Sweeper3D Part 2: Creating the Floating Rock
“Creating a Floating Castle in Blender & Photoshop w/ Sweeper3D Part 2: Creating the Floating Rock” via NVIDIA Studio.
The second part dives into the creation of the floating rock structure that supports the castle, focusing on establishing its initial shape and basic detail before the final detailing stage.
Key insights and techniques for sculpting organic forms include:
• Starting with a simple plane and extruding/scaling to block out the basic, pointed rock shape.
• Extensive use of Blender’s sculpt mode, particularly the grab brush, for pulling and tugging elements to achieve natural, organic forms.
• Applying the remesh modifier to enable dynamic topology sculpting and smoothing out jagged edges.
• Mastering the clay strips brush as the go-to for chiseling and building terrain, creating a basic cliff look.
• A powerful material mixing technique: combining Polyhaven cliff and grass materials based on slope data (Z-axis value) using a mix shader, bump node, separate color, and color ramp to naturally blend materials across surfaces.
• Placing and adjusting Quixel Mega Scans cliff assets, further refining their integration using the grab brush in sculpt mode.
Creating a Floating Castle in Blender & Photoshop w/ Sweeper3D Part 3: Sculpting the Environment
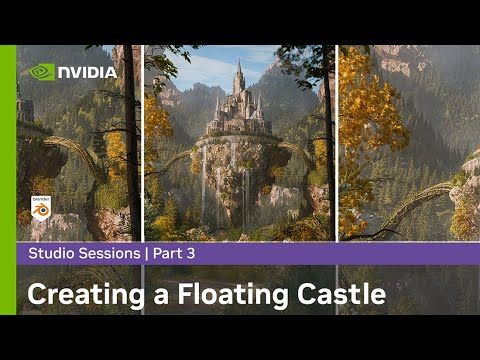
“Creating a Floating Castle in Blender & Photoshop w/ Sweeper3D Part 3: Sculpting the Environment” via NVIDIA Studio.
Sweeper3D’s third tutorial guides 3D artists through sculpting the large-scale fantasy environment surrounding his floating castle in Blender.
Key insights and techniques covered include:
• Starting with oversized planes for the ground and water to allow for sculpting freedom, then deleting unnecessary geometry.
• Using a 5’7″ character mannequin as a crucial scale reference for establishing accurate ground heights and overall environment proportions.
• Relying heavily on Blender’s Multi-resolution modifier for sculpting high-detail terrain (up to 30 million triangles) without performance lag.
• Employing the Clay Strips brush for building hills and roughed-out cliffs, and the Grab brush for pulling and repositioning terrain elements.
• Mastering different stroke techniques, such as broad circular strokes for lumpy hills and long side-to-side strokes for sharpening cliffs, carving riverbeds, and subtle pathways.
• Utilizing Ant Landscapes as a quick starting point for mountains, then refining them with sculpting tools.
• Separating specific foreground areas into distinct meshes to allow for finer, more detailed subdivision and sculpting without affecting the entire terrain’s poly count.
Sweeper3D also shares his compositional workflow, using composition guides as a flexible reference to distribute detail across the foreground, midground, and background, aiming for a visually pleasing outcome. The series will continue with adding materials like dirt, grass, and water in the next part
Updated 19.08.2025
Studio Sessions with Sweeper3D: Part 4 – Mastering Materials and Water Shaders
Creating Floating Castle in Blender & Photoshop w/ Sweeper3D Part 4: Adding Materials & Water Shader by NVIDIA Studio
In this fourth installment of the Studio Sessions series, artist Sweeper3D, powered by an RTX workflow, delves into the essential techniques for bringing life and texture to the floating castle environment within Blender. This segment focuses on efficiently applying stylized materials and crafting a compelling custom water shader, crucial steps in enhancing the realism and magical aesthetic of the scene.
Key Insights and Techniques Covered
Streamlining Environment Texturing
Sweeper3D demonstrates how to add foundational materials to the 3D environment with an emphasis on efficiency and visual impact:
- Asset Library Integration: The process begins by leveraging readily available materials from an asset library, significantly speeding up the texturing workflow.
- Targeted Material Application:
- A mossy rocky material is applied to the foreground elements using cube projection, with careful scale adjustments to ensure visual coherence, especially in relation to a human figure.
- For the midground and background, a grass material is utilized to create a lush green appearance. This strategic choice avoids the performance overhead of extensively scattering individual grass and fern assets, which would drastically increase render times. The material itself effectively simulates dense grass, allowing for lighter, more detailed scattering only where foreground definition is critical.
Crafting a Dynamic Water Shader
A significant portion of this tutorial is dedicated to constructing a versatile default water shader, a technique adaptable for various water bodies:
- Foundation of Reflection:
- The core of the shader involves mixing a Principled BSDF with a Transparent BSDF.
- A Light Path node, specifically set to “is camera ray,” controls this mix, ensuring realistic reflections are achieved.
- Roughness is typically set to zero for a highly reflective, shiny surface, though the tutorial notes that subtle variations with low roughness values or noise textures can introduce varied reflectivity.
- Achieving Depth with Volumetrics:
- A crucial element for realistic water is the use of a volume shader within an extruded plane object.
- Volume Scatter and Volume Absorption nodes work in tandem to create a murky, deep water effect. Volume absorption, in particular, makes the water appear darker at greater depths and brighter towards the surface.
- Density and absorption levels are finely tuned using a multiply node, effectively doubling the absorption amount for a more pronounced effect.
- The water’s volumetric color is determined by an RGB node, often adjusted with a Hue Saturation node to achieve desired blue or greenish hues.
- Adding Surface Detail:
- Water ripples are generated by mixing two noise textures, which are then connected to a Bump node.
- A mapping node provides control over the scale of these ripples, allowing for customization from subtle disturbances to more pronounced waves.
Sweeper3D emphasizes that this water setup is both simple to implement and highly adaptable, providing a solid foundation for various aquatic scenes. As this tutorial series progresses, the next part will delve into early detailing and the implementation of scatter systems, further refining the project towards its final render.
Part 5 – Diving Deeper into Early Detailing for Your Floating Castle Scene
Creating a Floating Castle in Blender & Photoshop w/ Sweeper3D Part 5: Early Detailing by NVIDIA Studio
In Part 5, the focus shifts to the crucial early stages of scene detailing, emphasizing efficient workflows and creative techniques to bring your floating castle environment to life. This segment explores how to set up scatter systems, refine environmental elements, and optimize performance for a truly cinematic result.
Key Insights and Techniques Covered:
- Optimized Asset Management:
- To enhance memory efficiency and simplify manipulation, all castle assets are selected, moved aside, and then re-imported as a collection instance. This crucial step ensures smoother performance, especially when dealing with complex scenes.
- Strategic Scatter Systems:
- Foreground Preparation: The foreground is meticulously prepared for scattering various assets like grass, pine trees, flowers, ferns, and rocks.
- Vertex Group Utilization: Sweeper3D demonstrates the power of vertex groups, creating them based on the camera’s view to limit scattering to visible areas, thereby optimizing performance. A separate “path” vertex group is also used for specific elements like moss and leaves.
- Distance Scaling: A clever technique, distance scaling, is employed to make instances appear smaller further from the camera, effectively faking density without excessive memory usage.
- Procedural Distribution: Noise textures are utilized for procedural distribution patterns, creating randomized clusters of assets like flowers, with different seeds preventing overlap.
- Enhancing Environmental Realism:
- Volumetrics for Atmosphere: A large cube encompassing the scene is filled with volumetrics using a volume scatter node (low density, high anisotropy) to achieve atmospheric effects like god rays, adding depth and mood.
- Flexible Sky Background: An image plane with an emissive sky texture replaces the traditional HDRi, offering greater control over contrast and saturation via RGB curves and hue/saturation nodes.
- Integrated Lighting: Lighting is established using a sun lamp linked to an HDRI via the “Sun Position” add-on, ensuring precise alignment. The importance of side lighting for highlighting details and creating depth is emphasized.
- Compositional Framing and Detailing:
- Guiding the Eye: Treetop assets are strategically used to frame the image, subtly guiding the viewer’s eye towards the central floating castle.
- Pathway and Cliff Detailing: The pathway is subdivided and displaced to add intricate detail to the rocks. Existing rock assets are duplicated, merged, and hand-placed to form cohesive cliff structures, further enhancing both foreground and background elements.
This early detailing phase lays a robust foundation, setting the scene for more intensive final detailing in the subsequent parts of the tutorial. Sweeper3D’s techniques not only enhance visual appeal but also prioritize efficiency and performance, crucial for professional 3D environments.
Updated 09.09.2025
Creating a Floating Castle in Blender & Photoshop w/ Sweeper3D Part 6: Mastering Main Details
Welcome back to the NVIDIA Studio Sessions! In Part 6 of the “Creating a Floating Castle in Blender & Photoshop” series, led by the talented Sweeper3D, the focus shifts to bringing the main details of the majestic floating castle to life. This installment, powered by RTX, delves into refining key architectural elements and adding bold features that imbue the castle with unique character and narrative.

Key Insights and Techniques Covered
- Strategic Asset Placement: The process emphasizes a trial-and-error approach to populate empty areas using an asset library. Sweeper3D demonstrates how to import, test, and discard assets without overthinking, favoring a color palette of greens, yellows, reds, and oranges to break visual monotony.
- Enhancing Ground and Water: Techniques include creating vertex groups for scattering ferns on barren ground, subtly placing rocks beneath water for depth, and using rock clusters at river edges to naturalize the grass-water seam. Meticulous placement is reserved for foreground elements, while background details are handled more roughly, relying on distance and volumetric effects to obscure imperfections. Render time is optimized by cropping out unnecessary bottom sections.
- Foreground Pathway Detailing: The pathway is enriched with strategically placed red, orange, and yellow plants for color distribution. Hand-placed rocks, often angled to follow the path’s slope, guide the eye naturally. Twigs, sticks, logs, and weeds are added to fill spaces, increasing complexity. A slanted rock leaning inwards establishes framing on the composition’s bottom section.
- Controlled Lighting with Environment: Rather than building an entire environment, trees are positioned outside the camera’s view to block the sun, creating controlled, natural-looking shadows on the path and castle. This technique introduces variance in highlights, draws the viewer’s eye to focal points, and darkens less important areas.
- Refining the Floating Island: Cliff rocks are combined and sculpted with a grab brush for a more pointy and slim appearance. Winter tree assets are ingeniously used as “roots” at the bottom of the floating cliff. A tree scatter system with elevation and slope controls ensures trees populate only grassy sections, and silver maples are scattered within the castle area for a “lived-in” feel.
- Adorning the Castle Structure: Greenery is strategically added to the castle to break up its blue and gray dominance. Tall, pointy shrubs act as “green spires” on circular corner pieces, while red and white trees introduce warm colors. Wavy hedges are placed on flat wall tops with an emphasis on symmetry. An ivy generator (geometry nodes) blankets repetitive cliff rock, complemented by filler shrubs and slanted trees growing from cliff sides.
- Compositional Adjustments and Volumetrics: The entire floating castle and rock are repositioned closer and slightly lower to enhance scale and presence. A duplicated fog/volumetric cube is placed near the floating rock in anticipation of waterfalls, later enhanced with noisy volume for a cloud-like appearance.
- Procedural Elements and Final Touches: Procedural vines, created with a geometry nodes tool, serve as “bridges” connecting the floating island to surrounding hills and cliffs. Smaller versions are used for foreground framing and distant river details. A noise texture applied to the volumetric cube in the shader editor creates subtle, circular cloud-like patterns, with a W slider for seed control and a color ramp for fall-off adjustment. The session concludes with the addition of a hanging willow tree to the right-side cliff.
Sweeper3D’s meticulous approach to detailing, combined with smart environmental techniques and procedural generation, demonstrates how to elevate a scene from a strong foundation to a cinematic masterpiece. These techniques not only enhance visual appeal but also optimize workflow, making the creative process more efficient and impactful.
Updated 01.10.2025
Mastering Cascading Waterfalls: Part 7 of the Floating Castle Series
In Part 7 of the NVIDIA Studio Sessions series, Sweeper3D guides us through the intricate process of bringing a floating castle scene to life with dynamic, cascading waterfalls. This tutorial focuses on step-by-step techniques to create realistic water flow and integrate impactful waterfalls into your digital environments, culminating in a cinematic touch using Blender and Photoshop.

Key Insights and Techniques
Sweeper3D begins by emphasizing a procedural approach to waterfall creation in Blender, especially suited for fantasy art where the water source is often distant or less critical. The foundation involves a Bezier curve, extruded to form the basic geometry of the waterfall.
Material Creation for Realistic Water Flow
A significant portion of the tutorial is dedicated to crafting a convincing material. This involves generating an edge mask using Texture Coordinate and Separate XYZ nodes, which helps define the waterfall’s form and transparency. Two Principled BSDF shaders are prepared: one for foam (white, high roughness) and one for water (desaturated light blue, low roughness, high transmission). These are then mixed using a Noise Texture and Color Ramp for a natural, random blend of foam and water. Crucially, a Transparent BSDF is introduced, driven by the refined edge mask, to achieve realistic transparency and a gentle fade at the waterfall’s edges. Subtle surface texture is added via a Bump node connected to the Noise Texture.
Animating the Waterfall Flow
To animate the continuous downward flow, a Mapping node is employed. Its X-location is controlled by a Math (Multiply) node, which is dynamically driven by a #frame/240 expression. This ensures the waterfall seamlessly flows downwards, adding a vital element of realism and motion to the scene.
Scene Integration and Refinements
Once the waterfall is created, it’s imported into the main scene and meticulously positioned around floating rocks and cliffs. Optional refinements include adding a Solidify modifier to give the waterfall depth, particularly useful for distant views. A key technique for enhancing realism involves making the waterfall fade out towards the ground, simulating mist. This is achieved by duplicating the transparent Mix Shader setup and controlling its factor with an Empty object’s location, allowing for dynamic adjustment of the mist effect. Multiple waterfalls can then be duplicated and positioned to populate the entire environment. This advanced tutorial offers invaluable Blender VFX & Simulation techniques for artists looking to elevate their fantasy scenes. Mastering these material and animation workflows can significantly enhance the visual fidelity of your projects.
Updated 06.11.2025
Continuing the Studio Sessions: Finalizing the Floating Castle
Part 8 of the NVIDIA Studio Sessions with Sweeper3D focuses on finalizing the 3D Floating Castle environment. This segment details crucial steps for achieving professional results, including selective detailing, configuring optimal render settings (Cycles), managing complex alpha channels, choosing the AGX color space, and setting up the Compositor to export essential passes (Mist, AO, Volume Direct) for final post-processing in Photoshop.
In the penultimate part of the acclaimed Studio Sessions series, creator Sweeper3D moves beyond modeling and core environment setup to focus on the technical details and artistic final touches that transform a good scene into a breathtaking one. This phase ensures the render is fully optimized and perfectly prepared for professional post-processing in Photoshop.

Refining the Visual Narrative
Before hitting render, meticulous detailing is paramount. The creator emphasizes the importance of breaking up repetitive color schemes—in this case, introducing subtle autumn hues (yellows and oranges) via new assets like larch trees to counter the scene’s dominant green palette. For highly complex compositions, the creator recommends an intensive technique: using render regions aligned with the Rule of Thirds grid. This allows artists to perfect one composition square at a time, ensuring every portion of the image is flawless before the final render.
Essential Cycles Render Settings
Properly configuring Blender’s Cycles render settings is critical for both visual quality and efficient rendering time.
Output Verification and Samples
First, always verify the Outliner to confirm that all unintended objects (like default character models) are disabled for the render output. Regarding quality settings, approximately 1,000 Samples are recommended for stills to virtually eliminate noise, especially in complex lighting scenarios. For scenes with extremely clean lighting, artists might successfully use fewer samples (300-500).
Light Paths and Transparency
While default settings often suffice for Diffuse and Glossy bounces, two settings require special attention for nature scenes and ArchViz:
- Volumetrics: Ensure the Volumetrics bounce count is set to at least 5 to guarantee proper softness and quality for effects like fog or clouds (VDBs).
- Transparency: Because nature assets heavily rely on alpha channels for foliage, the Transparency bounce limit must be increased to a high value, typically between 20 and 35. Failing to increase this can cause transparent parts of trees or leaves to render as unnatural black artifacts.
Color Management and Output
For a visually compelling result, the creator selects AGX over the standard Filmic color management system, preferring AGX’s aesthetic contrast. For the final output resolution, a standard 4,000 x 5,000 (4×5 aspect ratio) is used for portrait work, providing maximum resolution for detail retention and easier post-processing. Those utilizing NVIDIA RTX GPUs will find acceleration crucial for managing these high-resolution, complex scenes quickly. You can explore more about how the hardware impacts creative workflow on the NVIDIA Studio website.
Compositor Setup for Post-Processing
The final stage in Blender involves setting up the Compositor to export necessary passes for powerful manipulation in Photoshop. The goal is to produce a composite output that closely mirrors the final viewport view while retaining flexibility.
Key Passes and File Output
Essential passes exported for this scene include:
- Combined
- Mist
- Volume Direct
- Ambient Occlusion (AO)
Utilizing File Output nodes for Mist, Volume Direct, and AO simplifies the process by automatically saving these specific passes to designated folders upon rendering.
Denoising and Final Touches
A separate Denoise node must be applied specifically to the Volume Direct pass, as this channel often renders with visible grain and artifacts. A subtle Lens Distortion node is also employed, using a minimal dispersion value to introduce a very slight chromatic aberration effect on the edges of the image, enhancing realism.
This meticulous setup ensures the final render is ready for the upcoming post-processing phase. If you are following this series, be sure to check out the full Studio Sessions playlist to catch up on earlier parts. For more advanced workflows involving lighting, rendering, and volumetric effects, consider diving deeper into our Blender VFX & Simulation content or tutorials on Blender Lighting & Rendering.


