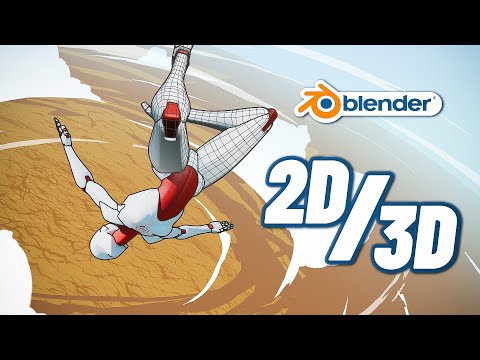
Unlock the secrets to blending stunning 2D and 3D animation in Blender! Animator Pierrick Picaut shares his four-step workflow, focusing on camera control, hand-painted backgrounds, stylized characters, and dynamic 2D VFX to achieve a truly unique hybrid aesthetic.
The world of animation constantly evolves, pushing the boundaries of visual storytelling. One exciting frontier is the seamless integration of 2D and 3D elements, creating a distinctive look that blends the best of both worlds. Achieving this hybrid style can seem daunting, but thankfully, experts like Pierrick Picaut are here to demystify the process. Pierrick, a renowned Blender artist celebrated for his expertise in character animation and rigging, offers a comprehensive breakdown of his workflow for mixing 2D and 3D animation directly within Blender and After Effects.
Pierrick’s approach is rooted in understanding and emulating traditional 2D animation principles within a 3D environment. This commitment to artistic fundamentals, combined with his mastery of modern tools, allows him to produce work that truly stands out. His latest project serves as a fantastic case study, demonstrating how thoughtful planning and clever techniques can result in a beautifully stylized animated piece. He emphasizes that with a clear methodology, artists can replicate this sophisticated style for their own projects. If you’ve ever felt limited by purely 3D aesthetics or struggled to give your 3D work that beloved hand-drawn charm, Pierrick’s insights are invaluable.
Mastering the Hybrid Look: Pierrick Picaut’s 4-Step Process
Pierrick outlines a clear, four-step process for achieving this sought-after hybrid aesthetic, heavily inspired by the limitations and conventions of classic 2D animation.
Step 1: The Art of the Static Camera
The first critical step involves intentionally limiting the 3D camera’s movement to mimic 2D perspective. Unlike typical 3D productions where cameras often move freely, traditional 2D uses fixed perspectives for backgrounds. Camera panning or rotation is simulated by moving the visible frame over a larger 2D background. To replicate this, Pierrick utilizes a dolly rig, often from a Blender add-on, and strictly avoids changing the camera’s location. The camera can only zoom or rotate, which maintains the fixed perspective. In many shots, he leaves the camera completely static, animating characters relative to it as if they were 2D drawings. Adding character deformations or smears further enhances this forced 2D perspective. He also credits Pablico Fournier of Blender Studio for inspiring his custom 2D camera rig, a tool he later offers as a gift.
Step 2: Crafting 2D Backgrounds
For backgrounds, the second step is to hand-paint them in Photoshop to achieve an authentic 2D aesthetic. Maintaining a consistent style and recognizable environments across shots is paramount. Pierrick emphasizes using strong, exaggerated shapes, like an arch, to push depth and perspective without becoming overly complex to draw. He shares two methods for determining background sizes: duplicating the main camera, making it static, and reducing its focal length to bind the main camera’s framing for reference; or simply placing a large plane facing the camera as a resolution guide. These 2D backgrounds are then rendered directly in the 3D view using a simple plane with an emissive shader, or placed and moved in After Effects to fake camera panning.
Step 3: Bringing Characters to Life with 2D Flair
The third step focuses on characters and their visual treatment. While animation style is a separate topic, Pierrick details character shading and line art. Characters use a simple principled BSDF shader, lit primarily by a gradient world background that matches the 2D background’s colors, supplemented by a simple sunlight. Contrast is then subtly pushed in After Effects. For line art, a Grease Pencil line art modifier is employed. To address the common issue of constant stroke thickness in 3D space, which can appear too thick or thin depending on camera distance, a custom geometry node modifier is used. This modifier allows for screen-space thickness, providing the consistent stroke quality of a 2D drawing. Additionally, character shadows are rendered separately using Cycles as a shadow catcher and then composited in After Effects for optimal control.
Step 4: Dynamic 2D Visual Effects
The final step incorporates VFX. All visual effects are hand-drawn 2D VFX made in Adobe Animate, though they could also be done using Blender’s Grease Pencil. Pierrick stresses avoiding overly complex shapes due to the time commitment involved. These VFX are then composited in After Effects with solid colors, a subtle blur, and transparency. A particular challenge was a rock explosion effect, which he tackled by taking inspiration from Sakuga animator Yutaka Nakamura’s distinctive “Utapon cubes.” This involved animating simple cubes, sculpting them for rocky details, applying a simple 2D-looking shader, and adding dust trails for directionality. Impact frames are also mentioned as a crucial element for dynamic visual storytelling, with a dedicated video planned for future release.
A Special Gift: Enhance Your Workflow
As a special gift to the community, Pierrick offers an upgraded 2D camera rig for free. This rig, originally from Pablo Fun of Blender Studio, features controllers for camera shift and focal length. This allows users to pan in 3D space with no distortion, effectively replicating 2D camera movements and further enhancing the hybrid animation style discussed in his video.
Unlock Your Creative Potential
Pierrick Picaut’s detailed breakdown provides a clear roadmap for artists looking to dive into the exciting world of hybrid 2D and 3D animation. By thoughtfully combining the strengths of both mediums, you can achieve a unique and engaging visual style that truly stands out. His emphasis on foundational principles, coupled with practical Blender techniques, empowers animators to push their creative boundaries.
If you’re eager to learn more from Pierrick, be sure to explore his extensive resources. You can discover all his courses and free assets on P2design Academy. Dive deeper into animation with his Blender animation course, and for those interested in real-time visuals, he also offers a realtime VFX course. You can also visit his website for more of his incredible work.


