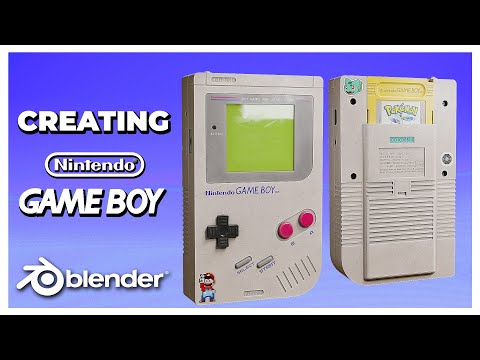
Dive into a complete modeling tutorial with Aniket Rawat, building the iconic Nintendo Game Boy from scratch in Blender. Master essential hard surface techniques, crucial modifiers, and the powerful Bool Tool for creating clean, production-ready prop assets.
For many 3D artists, creating retro props is a perfect way to hone hard surface modeling skills while tapping into nostalgia. Few devices are as iconic as the original Nintendo Game Boy, which, despite its simple block design, features complex curves, recesses, and details that make it an excellent modeling challenge.
Expert creator Aniket Rawat provides an in-depth, step-by-step walkthrough detailing how to model every piece of this handheld console in Blender. This comprehensive guide, which is the first of a two-part series (with the next focusing on texturing in Substance Painter), is perfect for intermediate users looking to level up their asset creation workflow. Rawat has even provided the necessary reference images and project files for users to follow along precisely.
Download the project files here
Setting the Stage: Essential Setup and Shortcuts
Before diving into the modeling process, Rawat emphasizes the crucial steps of setting up your viewport and handling reference images. Using reference images is non-negotiable for accuracy, and the creator shows how to import them and align them perfectly with the orthographic views (`1`, `3`, `7`, `9`).
Viewport Efficiency
A key efficiency tip demonstrated is enabling the “Only Axis Aligned” setting for the reference images in the Object Data Properties. This prevents the images from obstructing your view when rotating the camera, ensuring you only see the front reference when looking directly at the front, and so on.
The Importance of Scale
Starting with a simple default cube, Rawat meticulously refines the base shape to match the references using Edit Mode and X-ray view (`Alt+Z`). A critical piece of advice reiterated throughout the tutorial is the necessity of applying scale (`Ctrl+A`) after any scaling operation. Failure to apply scale can lead to disastrous results, particularly when using the Bevel tool (`Ctrl+B`) or modifiers, causing distortions in the geometry.
Mastering Boolean Operations and the Modifier Stack
Most complex details on the Game Boy—like the screen recess, speaker grills, and button cutouts—rely heavily on precise boolean operations. To streamline this process, the tutorial heavily utilizes the Bool Tool add-on, which must be enabled in Blender’s preferences.
This add-on allows for quick execution of standard boolean functions using the numpad shortcuts:
- Difference: `Ctrl + Minus` (numpad)
- Union: `Ctrl + Plus` (numpad)
- Intersection: `Ctrl + Divide` (numpad)
Crucial Modifier Management
When working with booleans and bevels, the modifier stack order is crucial. Rawat demonstrates that the Bevel modifier must always reside at the bottom of the stack, below any Boolean modifiers. This ensures the newly created geometry from the boolean operation is properly smoothed, avoiding severe shading errors. If shading issues still persist, moving the intersecting cutter geometry slightly (`G` then `Y`) or adding a Weighted Normal modifier often resolves the problem.
Detailed Modeling Workflow
The walkthrough systematically tackles the intricate modeling elements of the Game Boy, transforming the initial cube into a fully detailed prop:
1. Screen and Bezel: Utilizing the Intersection boolean with a beveled cutter object to create the exact recess depth.
2. Buttons: Creating the A/B buttons involves a clever trick: duplicating the mesh before applying the Difference boolean, allowing the artist to preserve the original button shape while creating the precise cutout for the housing.
3. D-Pad Ridge: This highly technical step involves complex edge loop creation (`Ctrl+R`) and vertex snapping to ensure the directional pad ridge is perfectly aligned and extruded along its normals (`Alt+E`).
4. Side and Back Details: The speaker grill is modeled using intersecting cylinders, while the battery compartment and external ports are shaped using reusable geometries and Difference booleans.
Troubleshooting Geometry Issues
Aniket Rawat also provides necessary fixes for common hard surface problems. For instance, he addresses Z-fighting—a visual artifact caused by overlapping geometry—by making intersecting objects’ mesh data unique in the Object Data Properties. He also demonstrates correcting mirroring errors by deleting faulty faces and accurately refilling the geometry using the `F` key, maintaining consistent edge thickness throughout the model.
Conclusion: Ready for Texturing
This comprehensive tutorial ensures that by the end of the session, you possess a clean, robust, and production-ready hard surface model ready for the next phase. Modeling the Game Boy offers invaluable practice in managing modifiers, utilizing reference images, and mastering boolean operations—skills essential for any aspiring Prop Modeling artist using Blender, which is, of course, a fantastic and free software package.
If you found these techniques helpful, be sure to check out the next part of this series focusing on texturing and rendering! For more expert-led content and tutorials, explore our guides on Blender 3D Modeling and dive deeper into the world of Blender Updates & Releases. You can also learn about related subjects like Blender Texturing & Shading to prepare for the subsequent rendering steps.
Source:
Creating a Nintendo Game Boy in Blender – Full Tutorial


