Join Vertex Arcade as he unravels the intricate process of transforming 2D concept art into a stunning 3D model of Hornet from Silksong in Blender. Discover techniques from cloth simulation to dynamic outlines in this comprehensive workflow guide.
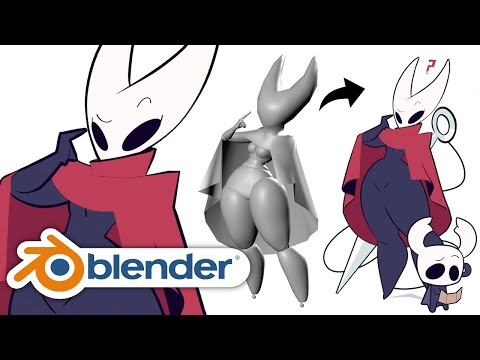
In the bustling world of 3D art, bringing beloved characters to life from their 2D origins is a challenge that demands both technical skill and artistic vision. Renowned artist Vertex Arcade recently embarked on such a journey, meticulously recreating Hornet from the highly anticipated game Silksong within Blender. His detailed video, “Bringing Hornet from Silksong to Life in Blender – Full Process Explained,” offers an invaluable look into his professional workflow, transforming a flat image into a dynamic 3D model.
Blender, an open-source 3D creation suite, stands out as a powerful and versatile tool, beloved by artists and indie developers alike. Its robust feature set, encompassing everything from sculpting to physics simulations and the unique Grease Pencil for 2D animation and drawing, makes it ideal for stylized character projects like this one. The project began with a reference image by artist Goodbyellow on X, aiming for an exact replication of their stunning artwork.
Crafting the Foundation: Posing and Proportions
The workflow commences by aligning the camera to the reference image and importing the artwork into the Blender viewport. Vertex Arcade utilizes his Adjustable Mannequin to establish Hornet’s initial rough form, focusing on proper weight distribution and a stable center of gravity. This iterative process avoids early commitments, allowing for gradual stabilization as he adds elements like swords, heads, and capes, ensuring both visual accuracy and 3D integrity.
Dynamic Details: Cloth, Outlines, and Threads
For the cape, the creator leverages Blender’s powerful physics simulations. By setting the body as a collision object and the cape as cloth, the fabric is allowed to fall naturally. Subdivisions add detail, while careful tweaking of thickness and collision distance prevents undesired intersections. To introduce dynamic flow, wind force fields are added, often requiring significantly increased strength (e.g., 2-3 thousand) for realistic movement. This method offers a compelling alternative to traditional sculpting of folds.
Once the cape is in place, fine-tuning proportions becomes crucial. Annotation lines, drawn directly in the viewport, serve as visual guides, reducing reliance on the reference overlay and allowing for precise adjustments. Threads are created using Blender’s curves, with a focus on ensuring they possess depth from all angles, avoiding a flat appearance. For sword outlines, Vertex Arcade employs the inverted hull technique. This involves expanding the mesh, assigning a black material, inverting it, and applying a special material to render it behind the main mesh. He further refines this using vertex groups and weight painting, allowing for dynamic outline thickness and control over where lines appear. For more detailed insights into this technique, you can check out his dedicated Dynamic Outlines Video.
Refining the Form: Retopology and Intricate Elements
Retopology is performed on the body to optimize the mesh, enhancing its flow and structure for better performance and easier manipulation. This step is particularly vital for defining precise Grease Pencil lines, which are challenging to achieve with the inverted hull technique alone. Edges are marked as freestyle edges, and a Grease Pencil object is set to draw only these defined lines, offering unparalleled control over the character’s stylistic contours.
The character’s hand presented a unique challenge due to its stylized, illogical representation in 2D. Vertex Arcade opted for a custom, “weird blocky hand shape” that perfectly matched the artwork, even if it didn’t conform to anatomical realism. For the eyes, a simple flat mesh was placed directly on the surface using snapping (face project) and then slightly inflated to perfectly match the head’s curvature.
The Final Touches: Eyes, Cape, and Speech Bubbles
To achieve the cape’s distinct material, featuring a darker interior, the artist ingeniously utilized backface data from a geometry node in the shader editor. This creates a mask for the inside and outside of the cape, which drives a mixed color node. However, ensuring outlines work correctly on the cape requires two solidify modifiers, leading to a manual selection and color assignment process for the new mesh faces.
Finally, the speech bubbles were designed to always point at the character and face the camera. This involved creating circles, offsetting the black portion, and positioning an arrow. A damped track constraint made the arrow point at the character, while a copy rotation constraint on the bubble, targeting the camera, ensured it always faced the viewer. Despite the apparent simplicity of the final model, the intricate setup of outlines and materials meant the entire project took approximately seven hours to complete. You can explore the finished Hornet model on Sketchfab.
Vertex Arcade’s tutorial is a testament to the power and flexibility of Blender, offering invaluable tips & tricks for anyone looking to bridge the gap between 2D concept art and compelling 3D models. His meticulous approach serves as an excellent tutorial for aspiring and experienced 3D artists alike.
Sources:
Bringing Hornet from Silksong to Life in Blender – Full Process Explained – Vertex Arcade


