Discover how to build dynamic, controllable cities in Blender from scratch using Geometry Nodes. Šime Bugarija’s tutorial guides you through creating optimized urban environments with impressive detail and customizability.
Are you an artist who’s ever found yourself needing a sprawling cityscape for a background, only to be daunted by the complexity of modeling countless buildings? Or perhaps you’ve struggled with optimizing detailed environments that bring your machine to a crawl? Fear not, as the world of procedural generation offers powerful solutions, and one master of this craft, Šime Bugarija, has delivered an exceptional tutorial that promises to revolutionize your approach to urban scene creation in Blender.
In his insightful video, “City with full control in Blender – tutorial,” Bugarija doesn’t just show you how to use a city generator; he empowers you to build one from the ground up using Blender’s potent Geometry Nodes. His approach emphasizes a crucial balance between performance and visual fidelity, ensuring your detailed cities run smoothly, even when scattering hundreds of structures across a vast urban canvas. This is a workflow that moves beyond simply importing pre-made assets, inviting creators to truly understand and manipulate their digital environments.
The Power of Geometry Nodes for Urban Landscapes
The core of Bugarija’s method lies in a simple yet highly functional Geometry Node setup. He starts by illustrating how a large plane serves as the foundation for the city, utilizing “distribute points on faces” and “instances on points” nodes to scatter low-poly building models. To inject life and avoid a monotonous look, the creator demonstrates clever techniques for introducing variation. A “random value” node allows for diverse building scales, while a more intricate setup ensures buildings rotate randomly but precisely on the Z-axis, specifically in increments of 90 degrees. A particularly elegant solution involves separating large and small buildings into distinct collections, grouping their node setups, and exposing control values in the modifier tab for independent management, finally merging them with “join geometry.” This modularity is key to achieving a truly controllable cityscape.
Optimized Detailing and Texturing Strategies
Beyond the foundational structure, Šime delves into optimized detailing and texturing. He advocates for a “collage texture” approach, where various facades, ground floor shop elements, roof details, and column textures are combined into a single image. This smart technique allows for extensive texturing diversity within the UV editor while maintaining efficiency – a crucial consideration for large-scale scenes. A high-resolution concrete texture is then layered for bump, roughness, and color input, adding vital micro-details. His recommended workflow is refreshingly practical: project the texture onto low-poly models first, then model details according to the texture, simplifying later UV mapping efforts.
Bringing Cities to Life with Dynamic Shaders and Lighting
Shaders are the next frontier for realism, and Bugarija crafts between four to five distinct shaders for each building. These include variations for facades, transparent and less transparent glass, and emissive materials for ground floor shops and interior lights. To convincingly simulate interior lighting, he employs a clever trick: projecting a new texture onto a cube placed inside each building. Crucially, object projection is used instead of UV projection, guaranteeing consistent light scale across all buildings and enabling global control over light intensity. A brick texture multiplied with an image texture, where dark areas become transparent, and a color ramp controls light emission, forms the basis of this system. To make this accessible, the amount and strength of lights are exposed as sliders in the modifier tab using drivers, eliminating the need to constantly dive into the shader editor. This level of user-friendliness is a hallmark of his approach.
Further enhancing realism, the creator introduces detailed assets for building roofs (antennas, structures, pipes, AC systems) and facades (AC units, awnings, neon signs). These assets are scattered using a simple Geometry Node setup, with vertex groups defining specific placement areas. These detail elements are easily toggled via modifiers, offering flexible scene customization. Šime Bugarija’s commitment to creating powerful, user-friendly tools is evident throughout the entire process, making complex procedural generation accessible to a broader audience.
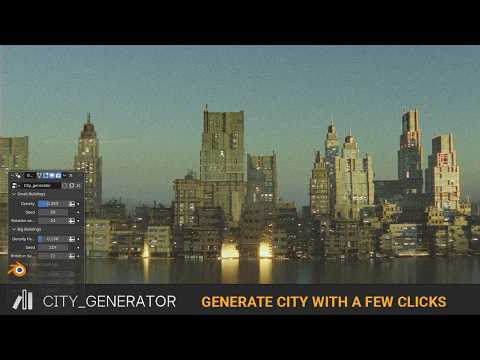
For those eager to dive deeper, Šime offers the full step-by-step tutorial, covering modeling, texturing, Geometry Nodes, scene creation, and modifier setup, through his Patreon, Gumroad (where the first part is free), or as part of a YouTube membership. Furthermore, his “Simple City Generator” asset pack, which leverages these very techniques, is available for purchase on Blender Market, often featuring special sales. You can also explore his related Editing Buildings Asset Pack on Superhive. This comprehensive package is designed for quickly creating a city in the background with just 11 sliders, offering unparalleled control over everything from building density and rotation to interior and overall city lighting. Whether you are aiming for stunning ArchViz or dynamic game environments, his expertise provides an invaluable resource for any artist looking to elevate their PCG skills.
Embrace the future of urban design in Blender and transform your creative workflow with Bugarija’s innovative techniques. The ability to craft intricate, optimized, and fully controllable cityscapes is now within your reach.
Sources:
City with full control in Blender – tutorial
Simple City Generator


